Macro and Close-Up Photography
January 16, 2021
Have you ever seen some interesting detail that caught your eye? You wanted to fill the frame, so you moved in close, only to not be able to get it in focus. Have you ever wanted to get a photo of something really small, like a ladybug or a tiny delicate flower? But, the camera wouldn’t focus until you backed away so much that it became just a tiny piece of the whole image. This happens to me a lot, and it can be really frustrating. The cause is that each and every camera’s lens has a minimum focusing distance. What this means is that if you are closer than that particular lens’s minimum distance, it physically will not be able to get your subject in focus. Fun fact – the longer the lens, the greater that minimum distance is, so the farther away you need to be from your subject. Yet, you may have seen amazing detail images like those you’ve wanted to capture. So, how is it, you might be wondering, that others can get these photographs, whether it’s the individual hairs of a horse’s eyelashes or the many faucets of a dragonfly’s eye? This is the realm of macro and close-up photography.
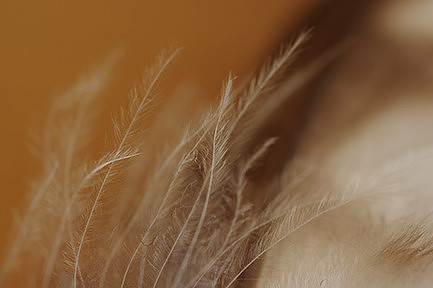
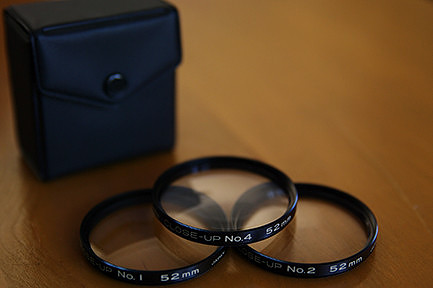
Detail of the tiniest pieces of a bird's feather. If you are trying to photograph something to bring out the small details and to fill the frame, there are different ways to accomplish this. One is to use a set of macro filters that you screw onto the end of your lens like any other filter. They come in different magnification strengths and are stackable for even greater variety. Just like with a magnifying glass, they make everything seem bigger while letting you get closer than you normally could with that same lens. They are relatively inexpensive, so they can be great for the beginner just starting to experiment in close-up work. I got my set of filters over 15 years ago and took them with me everywhere just in case something caught my fancy.
The set of macro filters that I used to start exploring the fascinating world of macro and close-up photography. Filters are great, but remember, they’re not going to result in the highest quality images. Any time you add more glass in front of the lens, it can reduce image quality to some degree. Because these are magnifiers, they will also amplify any defects in the lens itself. For me, at least, that didn’t matter for a long time. They were fun, cheap, and a great way to learn and experiment more with photography. Usually the next step in price and image quality is to get some extension tubes. These go between the lens and the camera body, rather than on the front of the lens like a filter. Unfortunately, they aren’t available for every camera/lens manufacturer. I have never used them, so I can’t give much advice on how they work. I have only heard about them from other photographers. Another option I’ve heard of but never experienced is to attach your lens to the camera backwards. I’m not sure if only some lenses have this capability or if they require an adapter to do this. I have heard this is another way to get magnification out of a regular lens. Another route that many people don’t think of at first is to use a longer lens. Our instinct is to always get closer. But, since the purpose of big lenses is to make things far away seem close, we can use that to our advantage with small things too. If you’re willing to back up some, you can then use a bigger lens to really fill your frame with your subject. I know of several photographers who use this technique specifically with flowers. It’s also common with those wonderful close-up detail shots of wildlife. The photographers are not getting within touching distance of those big animals, as that would be too dangerous for both. Instead, they use the big lens to compress the distance, ‘bringing’ the animal closer.
The last option is to get an actual macro lens. There are lenses with ‘macro’ settings, and then true macro lenses. Technically, for it to be a ‘true’ macro, it means it must be able to render the image 1:1, one-to-one, ie, the actual life-size of the subject matter on the film or sensor. So, to get technical for a moment, in the world of film, 35mm was the most common format known to the general public. In the digital world, a full-frame camera means that the digital sensor is the same size as the 35mm film, which is 35mm or 1 3/8 inches long approximately. If you have an APS-C camera, the sensor is smaller than that, and a micro four-thirds camera, even smaller. Let’s have an example. Remember, all measurements are approximate. So, going back to full frame 35mm for a moment, you have a 1:1 macro lens and a subject that is just under ¾ of an inch long in the real world. When you take your photograph, the subject will take up the same almost ¾ of an inch of space on the camera sensor. Now, when you view your photograph on your 13-inch laptop, your subject will appear roughly 6 ¼ inches in size! That’s one of the things that is so fascinating about macro photography, the ability to see really tiny things larger than life.
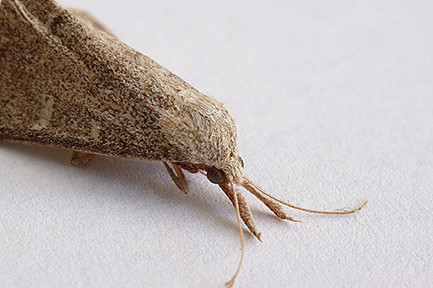
A one-to-one image of a moth taken with my 50mm macro lens. Not only can you see the detail in the body, eye, and antennae, you can even see the texture of the paper used for the background. As you can imagine, there are lots of different types of macro lenses out there. Even if your lens isn’t a ‘true’ macro, just has a macro setting, or only goes to half life-size, for example, when you blow the image up to the size we’d be viewing it at, it’s still impressive. On the other end, there are lenses that go to 2 times life-size, even up to as much as 5 times life-size while still being classified as macro and not micro, like a microscope. In addition to that, you also have different sizes available for ‘true’ macro lenses. The most common is the 50mm, but there are also 100mm and 200mm focal lengths as well. You might be wondering why you would want different options for macro lenses in terms of the length. As I said at the beginning, the longer the lens, the farther away you have to be, so wouldn’t you want the smallest closest possible? Well, not necessarily. It all boils down to reach, focusing distance, and depth of field. All dedicated macro lenses have smaller minimum focusing distances than regular lenses of the same length. A 50mm macro lets you get a lot closer than a regular 50mm. However, dedicated macro lenses have a much narrower depth of field than their regular counterparts. So, a 50mm macro will have less of an object in focus than a regular 50mm lens would. As mentioned in a previous post, the longer the lens, the narrower the depth of field. So, a 100mm macro will have less depth of field than a 50mm macro. However, the closer you are to a subject, the narrower the depth of field. So, because you can get farther away with a 100mm macro than with a 50mm macro, even though the 50mm macro lens inherently has greater depth of field, because you’re so close, you might end up with better depth of field with the 100mm macro lens.
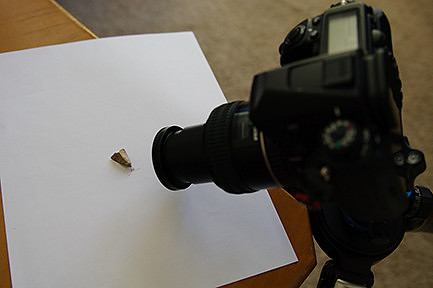
The setup I was using for the moth shot above. You can see how close the moth was to the front of my macro lens, as well as its relative size. Let’s talk about reach for a moment. When doing macro photography, you are zoomed in as far as the lens goes. You then move the camera minutely to get the subject in focus. Sometimes, depending on the size of the subject matter, you might actually have to have it touching the front of the lens itself in order for it to focus properly. That’s not always ideal. Since I only have the 50mm macro, I often zoom the focus back just a little so that I’m no longer at 1:1 so the subject will be in focus without touching the lens. If I had a 100mm or larger macro lens, I could be farther back from the subject and remain at the full 1:1 size. This is especially a benefit when photographing something dangerous, like a scorpion or snake. Just like using a big lens for close-up shots of a tiger, using a big macro keeps both the animal and the photographer safe. If you really get into macro photography, there are more specialized tools to help you. Remember, you will almost always be on a tripod. The very narrow depth of field requires you have to have the camera in a fixed location. The magnification of the subject also means that any movements are magnified as well, both of the camera, and of the subject, so you want to eliminate any camera shake by having a steady mount. With the minute focusing adjustments necessary, it really helps if you get a nodal rail for your tripod. This lets you mount the camera to the rail and then slide the camera forwards and backwards or side to side in tiny controlled increments without changing the camera angle to get the sharpest focus.
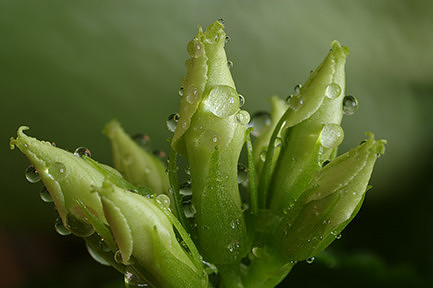
Detail of budding flowers and water droplets, taken with my 50mm macro lens. The tallest bud in the center was only 1/2 an inch tall. Lighting is also a big consideration with macro photography. Using only natural light can be tough, and a normal flash setup is almost impossible. You are so big and so close to the subject that you block a lot of the ambient light. And, a normal flash setup would either go straight past your subject, hit your lens casting a giant shadow, or completely overpower and overexpose your subject. There are multiple specialized lighting options you can get that allow you to control the lighting of your subject to the best possible extent. Personally, I’m not at the point yet where I want to invest in these and other tools for my macro work. I’m still just exploring and learning and having fun along the way. I encourage you to get out there and try it too. And, remember, anything can be a subject for macro if you only have the vision to imagine it.
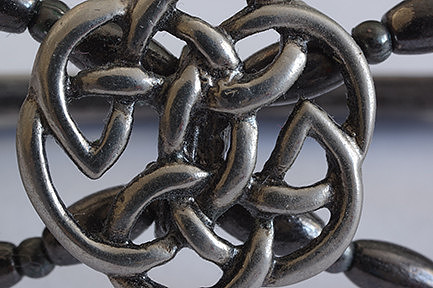
An interesting Celtic design on a hair clip, taken with my 50mm macro lens. That piece of the clip only measures 3/4 of an inch wide. ~ ~ ~ ~ ~ ~ ~ ~ Click here to see more macro photos. |