How to Properly Care for Your Camera Lenses and Equipment
July 11, 2026
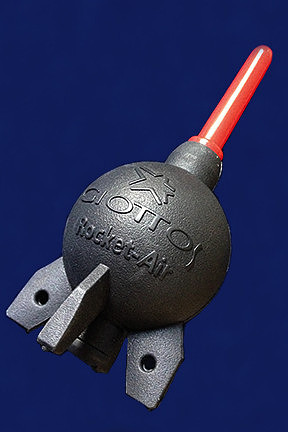
Today, I’d like to talk about something that is important for all photographers, and that’s how to properly take care of your camera lenses. This applies not only to cameras with interchangeable lenses, but to any camera, including cell phones. Obviously, certain things will be slightly different or won’t apply, but the general principles can be used by everyone. I’m not an equipment expert, so I reached out to the folks at my local camera store, Hunt’s Photo and Video, to ask them for specifics. First, let’s discuss how to clean your lens when you’re at home in a clean environment away from the elements. It’s a relatively easy process that takes only three steps. If your camera uses interchangeable lenses, you can do these steps for both the front and rear glass elements, as well as any glass filters you might use. First, point the glass you’ll be cleaning face down. This is to ensure that anything that comes off the lens will fall to the floor rather than dropping back down onto the lens. Take a small blower, such as the rocket blower, and puff it at the glass. It’s important to never blow on the glass from your mouth. Our breath contains a lot of moisture, which can cause issues, such as fungus growing inside the lens. Also, do NOT use canned air like you might use on your computer keyboard. Those often have moisture and/or chemicals in them to help with electronics, and you don't want to risk your expensive glass.
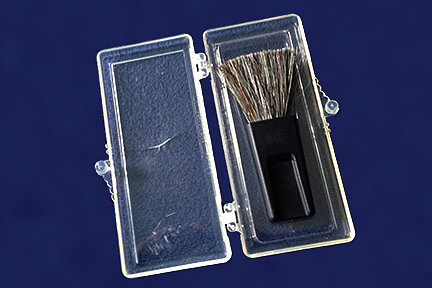
Second, make sure the glass is still pointing face down. You’ll want to use a small brush with special hairs to gently brush away anything that might still be sticking to the glass. It’s important to not use just any brush, as the bristles of many brushes can be rougher then you think. This can lead to accidentally scratching the glass.
Third, you can now hold the lens so you can more easily see the glass. Take a micro-fiber cleaning cloth and put a small amount of special lens cleaning solution onto the cloth. You only need a tiny amount of solution. No need to soak the cloth. Start in the center of the glass, gently rubbing with the cloth in circular motions, and slowly work towards the outer edges of the glass. Once you’ve done the entire surface, take a second clean, dry micro-fiber cloth and repeat the process in order to dry the glass.
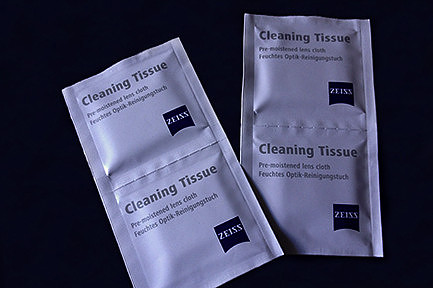
When traveling, you’ll want to bring all of this with you so you can clean your lenses while in your hotel room, but you may not want to try to bring a bottle of lens cleaning solution. It takes up a lot of space, can cause worry about breakage, and if you’re flying, you have TSA regulations to think about with liquids and sizing. The simple solution is to get individually wrapped cleaning tissues pre-dampened with solution. This isn’t the most environmentally friendly solution, so I don’t recommend going this route for all your cleaning needs, but they do work great for traveling. I know that both Zeiss and Nikon make these and possibly other companies, as well. Since they’re sealed, you don’t have to worry about packing, TSA requirements, or them drying out. You can buy a package, and as long as the packets are still sealed, they’ll be good years later. It would be worth picking up a package and tossing one of the packets in your camera bag for emergency use in the field, as well.
Some photographers choose not clean the front elements, as any dust on the lens may not be discernable in the image due to depth of field. Essentially, every lens has a minimum focusing distance, so if you’re focused on something out in the world, chances are nothing on the lens itself will be in focus and therefore won’t be noticeable in an image. Certain situations would still have spots show to some extent, however. Personally, I feel it’s best to keep your lens clean. Cameras and lenses are really expensive, and the point of paying that money is to get the best quality image as possible. It doesn’t make sense in my mind to pay that money and then risk lower image quality from having something on the lens, something that is so easy to fix. Additionally, cleaning and take care of the lens will help get the most longevity out of it. Now, don’t misunderstand. Just because a photographer may choose not to clean the front element of their lens doesn’t mean that they don’t care about taking care of their equipment. Some will have a filter on the front at all times to protect from dirt and scratches. A large amount of crud, anyone would work to get off. It’s just the fine dust, the individual specks, that they might not worry about right away. However, most photographers work hard to keep the rear glass element of the lens clean. Unlike with the front element, anything on the back will almost certainly show up in an image. I don’t understand the physics enough to try and explain why. However, just know that if the back element is exposed and gets anything on it, it is even more important to clean than the front element, in terms of image quality. When cleaning the rear element, just be careful so as to avoid damaging any of the connectors, both the electrical ones so the lens and body can talk to each other and the physical ones that attach the lens to the camera. Additionally, if you don’t have another lens or a cap on the body while cleaning this lens, make sure to do the cleaning far from the camera body. This is for the same reason that you clean the lens face down. You don’t want anything on the glass to fall off and down into the camera body, potentially ending up on your sensor. Now that we’ve discussed thorough cleaning when at home, let’s talk about what to do when in the field. It’s actually pretty easy. If you have room, bring your blower and brush with you. If not, try to bring at least one of them. Whether you can bring both, only one, or neither, the best thing is to make sure that you have some clean micro-fiber cloths with you. If your lens gets wet from rain or spray from a waterfall, take a clean, dry micro-fiber cloth and wipe the front of the lens with the same circular motions as when cleaning at home in order to dry it and keep shooting. Once you’re done shooting, take a new clean, dry micro-fiber cloth and do the same thing to dry the glass and then wipe over the entirety of the lens before stowing it in your bag. If your lens gets wet from sea spray, you’ll do the same thing, but it’s even more important to dry the glass frequently. If the water evaporates, it will leave salt crystals behind on the glass, and if you try to wipe your lens with a dry cloth afterwards, the salt crystals could end up scratching the surface of the glass. If you notice that the water did evaporate before you could wipe it off, do not try to wipe the lens or to brush or blow the salt crystals off. The crystals will actually be somewhat adhered to the glass and will take a bit more work to clean off carefully. If the glass isn’t coated too badly, you can choose to continue shooting and clean the lens when you return home. Otherwise, you’ll need to change lenses or call it quits for the day. If your lens gets wet from snow, try to brush the snow off the glass gently before it has a chance to melt. I would recommend using the same type of special brush as mentioned previously or a rocket blower to get the snow off. Snow can have ice crystals in it, and if the snow was from the lens brushing against something (such as a snow-covered bush) or dropped into a snow bank, it is possible there are bits of grit mixed into the snow, as well. You don’t want to rub the glass with a cloth until you’re sure that anything that might scratch the glass has been removed. Once the snow has been removed, you would take a clean, dry micro-fiber cloth and wipe the glass dry using the same methods as before. For all of these scenarios, there will be additional work you’ll need to perform once you return home. With sea spray, whether you had salt crystals left behind on the glass or not, you’ll want to take a clean micro-fiber cloth and add a bit of lens cleaning solution to it, then gently wipe the lens. Once you’ve finished the glass, take a new clean, dry micro-fiber cloth and use the same circular motions to dry it. After the glass has been cleaned, you’ll need to carefully repeat the process with the barrel of the lens, making sure to have the barrel fully extended (for both zooming and focusing, as applicable). Leave the lens fully extended off to one side for 24 hours, if possible, before replacing in your camera bag to ensure that any moisture has been fully removed. (If the lens got physically doused by the ocean, not just spray in the air, follow the steps below instead once you’ve cleaned the glass.) For snow, waterfall spray, or rain, once you’re at home, there’s still a good chance there’s moisture in the lens, even if it appears dry. Remove the lens from the camera body (if it’s not already) and take off both the front and rear caps, exposing the glass elements to the air. Then, turn the focus ring all the way back and forth a few times. Repeat for the zoom ring, as applicable. (If your lens is a prime lens that focuses internally, ie doesn’t get bigger and smaller with changing focus, this part doesn’t apply.) The lens can suck moisture into the inner workings as the rings are moved back and forth, so by doing this in a dry environment, it forces the moisture back out again. (This is especially important in extremely humid environments, even if the lens didn’t get wet.) Once you’ve finished, you’ll want to leave the lens fully extended and place it inside a Ziploc bag. Include a silica bag (they often come with camera/lens purchases as well as camera bag purchases, though they can also be purchased separately) inside with your lens. Seal the bag tight and set it to one side for 24 hours, if possible. The silica will suck up any moisture remaining inside the lens. Once the time has passed, you can replace your lens caps and return the lens to its normal storage location. Throw away the silica bag (if it’s not the reusable kind) so that you don’t accidentally put it with a lens later on and introduce moisture into that lens.
On a related matter, we need to discuss condensation. This can occur when there’s a large differential between air temperatures, when the camera equipment is going from a cold environment to a warm environment. This can be from AC indoors to hot temperatures outside or from cold winter air to warm indoor air. Condensation will happen immediately and can be very dangerous, not only fogging up the outside of the glass, but potentially allowing for moisture to get into the lens, as well. This can potentially lead to fungus growing inside the lens. Moisture from condensation can even fry the circuitry inside the camera itself. In order to help prevent this from occurring, it’s best to keep all the camera equipment in a bag (your normal camera bag is sufficient) during the transition and for 45 minutes to an hour afterwards so the temperature in the bag has time to slowly acclimate to the surrounding air temperature. For example, if I go out on a shoot in the winter, or even a night shoot on a cool summer day, when I’m all done, I pack everything into the camera bag and put it in the back of my vehicle, away from the heater. When I get home, I bring the bag inside and leave it in a safe place, again away from any heaters. I wait until the next day before opening the bag to remove any cameras, lenses, memory cards, etc. If you can’t wait that long to look at your photos, then remove the memory cards from the camera and camera bag while you’re still outside in the car. Be advised, however, that condensation can occur on memory cards, as well, so you are taking a potential risk of damaging the card and losing the data. At the very least, put the memory cards in a Ziploc bag so the condensation will form on the bag rather than on the memory cards. Finally, let’s discuss long-term storage of your camera lenses. The best place to store your lenses is an environment with ventilation away from sources of heat or water. You definitely don’t want to store the lenses wrapped in plastic (even though that’s how they come when purchased). The plastic can degrade over time and cause issues with the lens. You definitely don’t want to store the lenses near a heat source. The heat can dry out the oils inside the lens, causing issues and hampering the functionality of the lens. As mentioned several times already, you definitely don’t want to store the lenses near moisture, as that can foster fungus growth inside the lens itself, affecting the image quality you can achieve with the lens. Consequently, it’s best not to store camera lenses in an attic or in a basement, but rather in your regular living space. Keeping your lenses in a camera bag is actually a very good idea. The bag not only provides padding to help protect the lens, it’s not airtight, so there’s still some air circulation that helps prevent any of the issues previously discussed. It’s also a good idea to keep some of the silica bags in with the lenses, so long as they’re not used up. Make sure to take the silica bags out occasionally to inspect them and toss any that have sucked up some errant moisture, replacing them with fresh new bags (unless they’re reusable ones). Lastly, take the lenses out on occasion and give the zoom, focus, and aperture rings a few good turns to make sure everything is still functioning well and the oils haven’t dried out. I know this wasn’t a particularly exciting post, but I do believe it was an important topic to discuss. I hope you’ll find it useful and will be able to implement these techniques in the care of your own equipment. If you have any questions or would like to know more about cleaning or caring for your camera gear, there are numerous YouTube videos available as well as the friendly folks in whatever camera store is local to you. |